Subversion hosting, CVS hosting, Trac hosting, Bugzilla hosting and software collaboration Providing hosted Subversion, CVS, Trac and Bugzilla repositories
 

December 2, 2008

FreeBSD 8.0-CURRENT I386 (200810 Snapshot) Virtual Appliance Now Available

Filed under: Operating Systems — Tags: , , — Greg Larkin @ 6:27 pm

Hi everyone,

To go along with the FreeBSD 8.0-CURRENT amd64 virtual appliance I released a few days ago, I’ve also prepared one for the i386 architecture.

Get the virtual appliance here: FreeBSD 8.0-CURRENT i386 virtual appliance

As always, comments and feedback to virtualization@sourcehosting.net is welcome. Enjoy!


Call me - Greg Larkin: error

December 1, 2008

FreeBSD 8.0-CURRENT Amd64 (200810 Snapshot) Virtual Appliance Now Available

Filed under: Operating Systems — Tags: , , — Greg Larkin @ 12:13 pm

Hi everyone,

Do you want to experience FreeBSD on the cutting edge without devoting a brand-new piece of hardware to it? You can test out the latest and greatest FreeBSD bits by downloading the FreeBSD 8.0 amd64 virtual appliance.

You’ll need a BitTorrent client, and once the download has completed, you’ll have a .ova file. This is a self-contained virtual appliance running FreeBSD 8.0-CURRENT amd64, and you can either import it directly into certain VMware products (e.g. VMware Workstation, VMware Player 2.x) or use VMware Converter to convert it into virtual machine format for use within VMware Server 1.x and other products that don’t read .ova files directly.

FreeBSD amd64 doesn’t actually require an AMD CPU to run as long as the specific Intel CPU is the correct architecture. Check for supported CPUs on the FreeBSD amd64 project page.

The virtual appliance’s root password is “password” and a minimal number of services and packages are installed. The virtual appliance is perfect for experimentation and testing, and please send any feedback or questions about it to virtualization@sourcehosting.net.

Enjoy!


Call me - Greg Larkin: error

January 31, 2008

Updated FreeBSD 6.2 VMware Images And BitTorrent

Filed under: Operating Systems — Tags: , , , — Greg Larkin @ 5:28 pm

Hi everyone,

As I got further into configuring my sample VM, I decided it would make sense to provide a few different VM flavors for folks who don’t want to configure Apache, PHP, and other ports to get the PHP frameworks installed and working.

I’ve set up a BitTorrent tracker at http://torrents.sourcehosting.net:10692/, and I’ll place the various VMs there from now on. The installation process is as follows:

  • Download and install a BitTorrent client, if you don’t already have one. I recommend Azureus.
  • Grab the UsrPorts torrent.
  • Grab a FreeBSD 6.2 Basic Installation torrent, such as the Bare Bones VM, or the VM pre-configured with Apache. Check the main tracker site for other options, and view the torrent info page to find out what ports have been preinstalled.
  • Once the UsrPorts.zip file has been fetched by your BitTorrent client, extract the contents to a new directory.
  • Extract your selected FreeBSD 6.2 VM .zip file to the same directory and start up the VM with VMware Player or VMware Server.

The UsrPorts.zip file contains the /usr/ports filesystem that’s mounted in the VM. Since this filesystem is typically kept up to date by running portsnap while the VM is running, I’ve provided an initial snapshot for you, but it’s not necessary to keep re-downloading when I provide a new FreeBSD VM that you’d like to try out.

I hope this system works better for folks, and please consider seeding the torrents as you download the .zip files.


Call me - Greg Larkin: error

January 25, 2008

Booting Your First VMware Virtual Machine

Filed under: Software Development — Tags: , , , — Greg Larkin @ 11:13 am

Hello everyone,

Now that we’ve got some example virtual machines to play around with, let’s move on to the next step and get one running.

I’m using VMware Player on Windows XP, and the VM files have been extracted to My Documents\My Virtual Machines. The folder contents look like this:
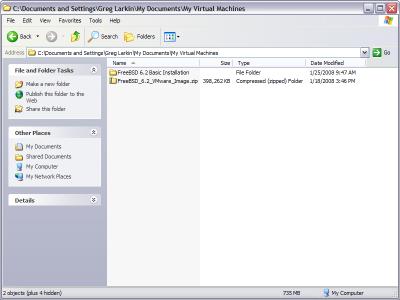
VMware Installation Directory

Digging into the VM installation directory proper, you see all of the files that make up your virtual machine:
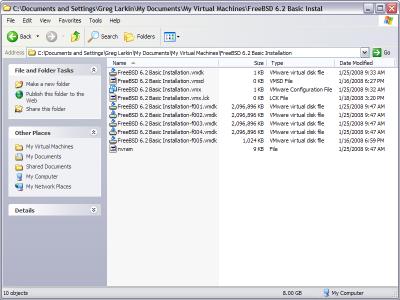
Virtual Machine Directory

The .vmx file is a text file that contains all of the virtual machine configuration options. You can change the VM memory allocation, add/remove devices, etc. just by editing that file. The .vmdk files are the virtual machine’s disks and store its state across reboots.

If your VM ever runs out of disk space and you still have room on your host operating system, you can create additional vmdk files and attach them to the VM. That sure is easier than cracking open a server case and physically installing new drives!

Next, double-click on the FreeBSD 6.2 Basic Installation.vmx file, and VMware Player starts up and boots the VM:
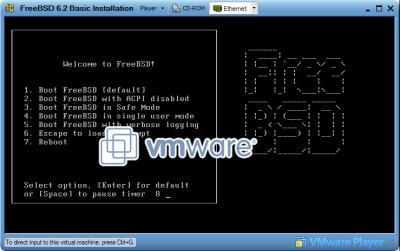
FreeBSD Boot Menu

After the usual messages, the virtual machine has booted, and you see the familiar UNIX login prompt:
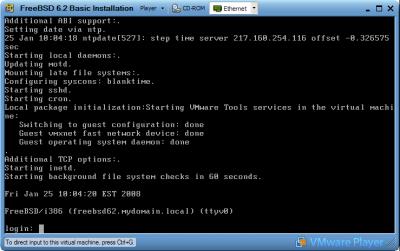
FreeBSD Boot Completion

Next time, we’ll dive into installing the various PHP frameworks under FreeBSD. The FreeBSD ports system is designed for ease of use, and you’ll see how simple it is to get a software package and all of its dependencies installed with one command.


Call me - Greg Larkin: error

January 18, 2008

FreeBSD 6.2 VMware Image for the PHP Framework Face-Off

Filed under: Software Development — Tags: , , , , , , — Greg Larkin @ 9:30 pm

Hi all,

After my last post, I realized it might be nice to provide a clean VMware image of FreeBSD 6.2 for folks who want to follow along as I try out the various PHP frameworks.

The first thing you’ll need to start up the virtual machine is one of the following free VMware tools:

Both of these tools allow you to run virtual machines on your server and/or desktop. The VMware Player is most useful if you just want to run pre-built virtual machines and use them for experimentation and evaluation. VMware Server gives the ability to create your own custom virtual machines and install your choice of operating system.

Once you have one of those tools installed on your machine, download a FreeBSD 6.2 VMware image from the SourceHosting.net BitTorrent tracker. You can find detailed instructions on setting up the VMware image in a subsequent blog posting.

The OS install is configured as follows:

  • Root user has no password
  • Networking is configured with DHCP and uses NAT for outbound connections
  • Extracted size is 11Gb
  • FreeBSD ports tree is installed in /usr/ports and is current as of 01/30/08
  • Latest security patches as of 01/17/08 have been applied

Extract the downloaded file somewhere on your drive and fire up VMware Player or VMware Server and follow the prompts to start the VM.

In case you’re new to FreeBSD, there’s a wealth of information in the Handbook. After you’ve logged in and had a look around, you can use the following command to shut the VM down cleanly:

/sbin/shutdown -p now

Look for a new post soon describing how to install each of the PHP frameworks.


Call me - Greg Larkin: error

Powered by WordPress